What is the process for having a solar power system installed?
So, you have decided to invest in a solar power system and have chosen Infinite Energy to install your system. Great choice! But you may be wondering what the next steps are.
This blog will give you a helpful overview of what to expect during your solar power system installation.
We've installed over 18,000 solar energy systems across Perth and the rest of the country (and counting!) and we've worked hard to make our installation process as seamless as possible for you.
Step 1:
After you have accepted the quote for your solar energy system and signed all of the necessary paperwork, one of our booking team members will contact you to organise a date for your installation, which will normally take place within 2 to 4 weeks. Someone will need to be home for the installation, which in most cases will take less than a day.
Step 2:
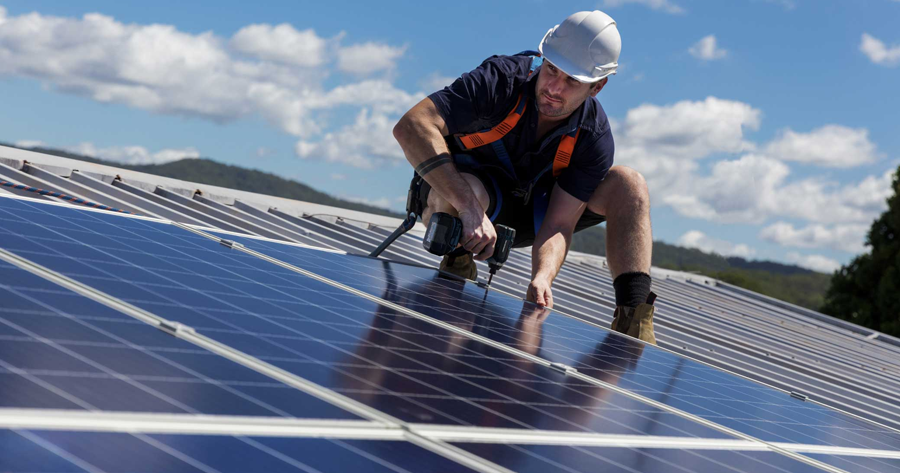
On the day of your installation, one of our experienced install teams will arrive and set up the site so that it is safe to work. Once on site they will perform a JSA (or Job Safety Analysis) and get up onto the roof for a final configuration assessment. The install team will then confirm the layout and location of your solar panels and solar inverter with you, including any changes that may result from the final configuration assessment. Once you are happy with everything and have signed off on the final plans, we can proceed to the installation.
Step 3:
Once everything has been confirmed, the install team will start preparing your roof for the solar panel installation and mount the panel railing that the solar panels will sit on. Meanwhile, the install team will connect all the system wiring, including switchboard connection, connecting DC cables from your panels to your solar inverter, mounting the inverter on the wall and securing the system safety isolators. They will also label the inverters and switch gear in the board.
Step 4:
Now it’s time to securely attach your solar panels onto the already installed panel railing and install your new solar inverter at the agreed upon location, normally in the garage. Once everything has been installed, connected and switched on, our install team will test all of the elements to ensure it is all working correctly.
Step 6:
The install team will then take you through a demonstration of your solar power system and any safety features and procedures you need to know, and we show you how to use the applicable programs and apps that you can use to monitor your new solar system.
Step 7:
Once installation has been completed, our administration and projects teams compile all relevant job data including your final invoice, electrical safety certificates, panels and inverter serial numbers, production estimates and warranty docs and send this through to you via email.
Now all that’s left to do is enjoy the savings that your new solar power system will give you. For your peace of mind, all of the solar panels we supply come with at least a 10 year product warranty and a 25 year performance warranty, giving you many years of guaranteed solar savings!
So, if you are ready to start saving money with solar power, contact us on 1300 074 669 or click here to arrange a consultation with one of our friendly team members today!